Transplanting cannabis is a crucial skill that can make or break your cultivation efforts. Whether you’re a hobbyist grower with a few plants or a commercial cultivator managing a large-scale operation, mastering the art of transplanting is the secret for producing healthy, high-yielding cannabis plants.
Get ready….you’re about to learn everything you need to know about transplanting cannabis, from nurturing delicate seedlings to managing mature plants.
Understanding the importance of transplanting cannabis
Transplanting cannabis is a critical process that goes far beyond simply moving a plant from one container to another. It’s a fundamental technique that can significantly impact the health, growth, and ultimate yield of your cannabis plants. From nurturing a few plants at home to managing a large-scale cultivation operation, understanding and mastering the art of transplanting is crucial for success.
But why? Transplanting cannabis is integral to the entire process, because it:
Prevents root binding
As cannabis plants grow, their root systems expand rapidly. In a confined space, roots can become tangled and compressed, a condition known as root binding. This can restrict nutrient uptake severely and overall plant health. Transplanting into larger containers gives roots the space they need to grow and thrive. A recent study found that root binding can reduce plant growth by up to 40%.
Promotes faster growth
When you transplant a cannabis plant into a larger container with fresh soil, you’re providing it with more nutrients and space to grow. This often results in a growth spurt as the plant takes advantage of its new environment.
Enables better nutrient uptake
Fresh soil in a new container is rich in nutrients. As cannabis plants grow, they deplete the nutrients in their current soil. Transplanting introduces the plant to a new, nutrient-rich environment, providing improved nutrient uptake and healthier growth.
Reduces the risk of pest & disease issues
Overcrowded roots in small containers can lead to stress, making plants more susceptible to pests and diseases. Transplanting can alleviate this stress, making your plants more resilient. It also allows you to inspect the root system for any signs of disease or pest infestation.
Enables better control over plant size & shape
Transplanting gives growers more control over the final size and shape of their plants. By choosing appropriate container sizes at different growth stages, you can manage the plant’s growth to suit your space and cultivation goals.
Supports the transition from seedling to mature plant
The needs of a cannabis plant change as it grows from a seedling to a mature plant. Transplanting allows you to adjust the growing environment to match these changing needs, providing optimal conditions at each growth stage.
It’s true that transplanting offers many benefits, but it’s also a delicate process that can stress the plant if it’s not done correctly. That’s why the proper techniques and timing are critical.
For additional cannabis cultivation techniques and insights, check out our blog on the benefits of proper cannabis defoliation.
The cannabis life cycle & transplanting stages
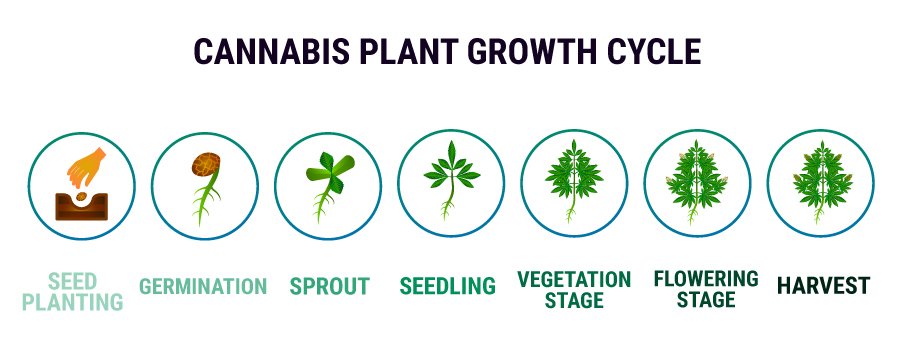
For successful transplanting, you must first understand the cannabis life cycle. Each stage of growth presents its own challenges and opportunities for the grower:
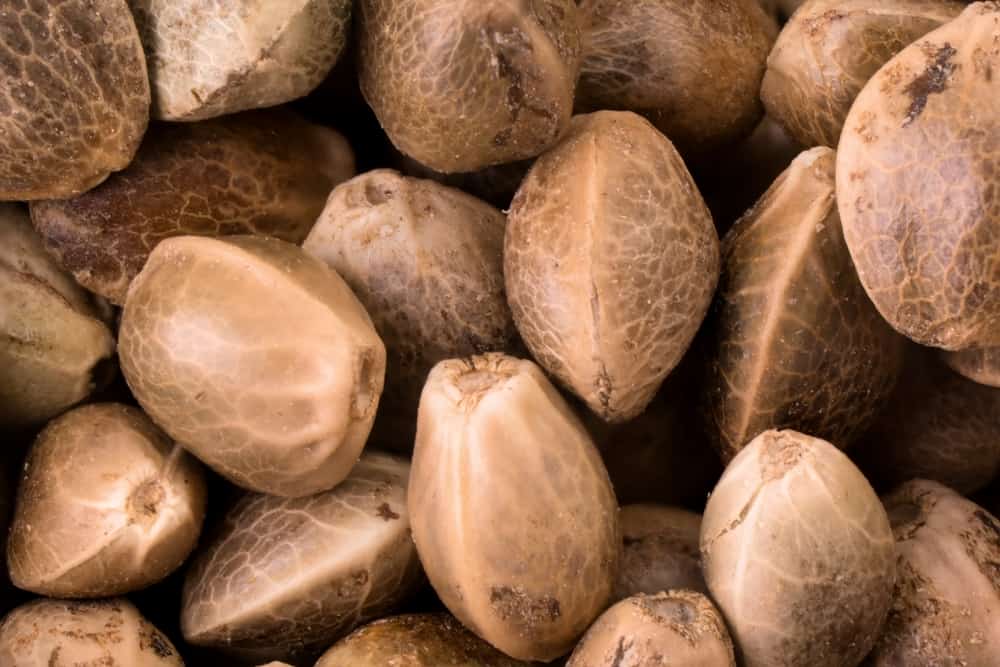
- Germination (0-10 days) – The very beginning of the plant’s life. The seed sprouts and a tiny taproot emerges. No transplanting is needed at this stage (the seedling is too fragile to handle).
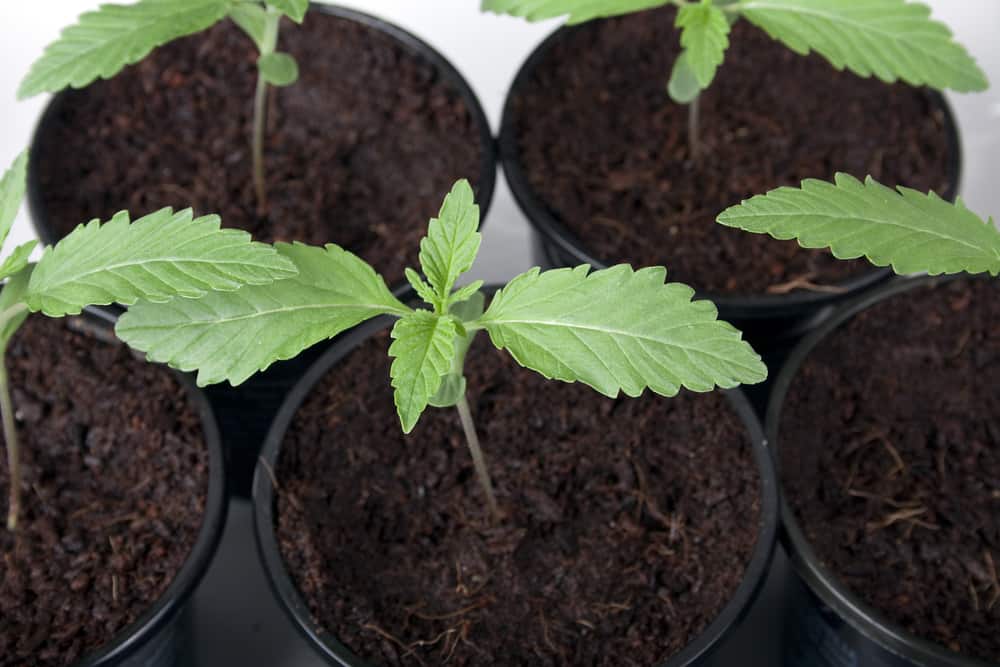
- Seedling (2-3 weeks) – The initial set of iconic fan leaves appear. The first transplant may occur towards the end of this stage, usually when the seedling has developed 3-4 sets of true leaves. This l transplant provides the young plant with more room to develop a strong root system.
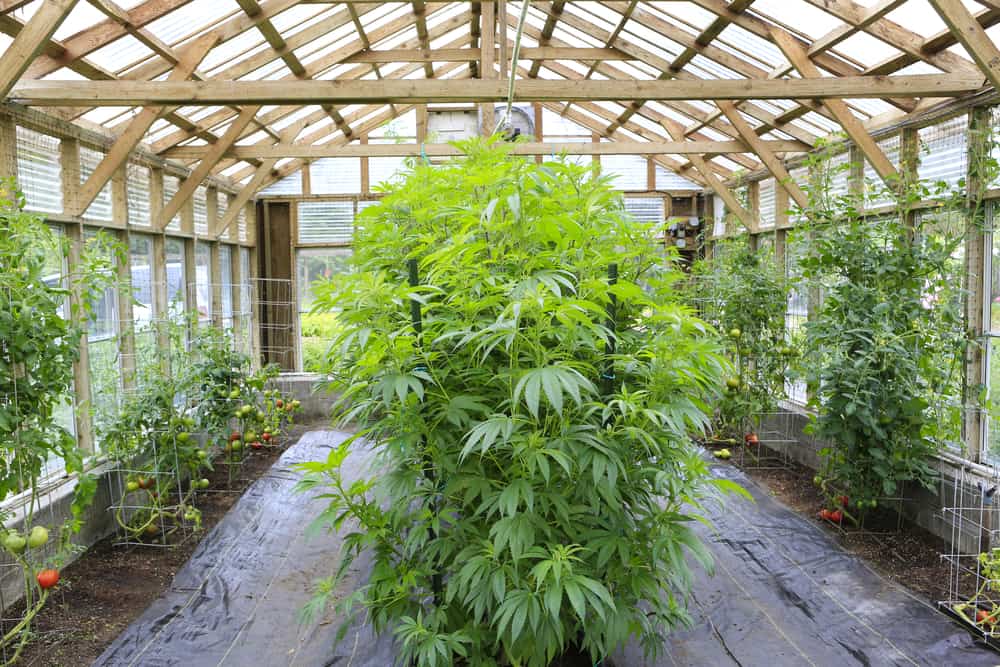
- Vegetative (3-16 weeks) – During this period of rapid growth, the plant focuses on developing its structure and root system. Multiple transplants may be necessary during this stage, depending on your growing strategy and the plant size you want.
- Flowering (6-12 weeks) – The plant starts producing buds. It’s best to avoid transplanting now because it can stress the plant and reduce the yield. Any final transplanting needs to be done just before switching to the flowering light cycle.
- Harvesting – The fruits of your labor are realized! No transplanting happens at this phase. However, the quality of your harvest will reflect the care taken in the previous stages (including proper transplanting).
For more in-depth information on the early stages – particularly germination – be sure to check out our blog on how to germinate cannabis seeds.
When to transplant cannabis: Recognizing the signs
Timing is everything, especially when it comes to transplanting. It’s a delicate balance – transplant too early, and you risk shocking your young plants or stunting their growth. Wait too long, and you might find your plants becoming root-bound, struggling to absorb nutrients from their now-cramped domicile.
For seedlings, the first transplant usually comes when they’ve developed their first set of true leaves (those iconic serrated leaves that scream “cannabis”). This is typically about 2-3 weeks after germination, and the young plant has developed a root system to handle the stress of moving to a new home.
As your plants mature, they’ll continue to give you hints that they’re ready for an upgrade. You might notice roots peeking out of the drainage holes, almost as if they’re trying to escape. Or perhaps you’ll see that the plant’s foliage has become a leafy umbrella that extends beyond the edge of its current container.
Sometimes, the signs are less visual and more behavioral. You might find yourself reaching for the watering can more frequently, as the plant guzzles water at an increasing rate. Or despite your best care, the plant might show signs of nutrient deficiencies – such as yellowing leaves or stunted growth – indicating that it’s depleted the resources in its existing container.
To help you navigate this integral aspect of cannabis cultivation, these are the indicators that your plants are ready for a new home:
- Visible root growth through drainage holes
- Leaves extending beyond the container’s edge
- Unexplained stunted growth or nutrient deficiencies
- More frequent watering needs
- Plant height approximately three times the container height
- For seedlings, the development of 3-4 sets of true leaves
These are guidelines, not hard and fast rules. Every plant is unique. Factors like strain genetics, growing conditions and your cultivation goals can all influence the ideal transplanting time.
Step-by-step process of transplanting cannabis
Successful cannabis transplantation requires care, precision and the right technique. From delicate seedlings to mature plants, following these steps for a smooth transition:
Step 1: Prepare the new container
Use a pot that’s about twice the size of the current one. Fill it partially with quality, nutrient-rich potting soil. Make a hole in the center large enough to accommodate the plant’s root ball.
Step 2: Water the plant in its current container
Do this about an hour before transplanting. Moist soil will stick to the roots, and this protects them during the move.
Step 3: Carefully remove the plant
For smaller plants, you can often squeeze the sides of the container to loosen the soil and roots. For larger plants, you may need to gently tip the container on its side and guide the plant out. Be extra gentle with seedlings; their roots are very delicate.
Step 4: Put into the new container
Position the plant in the center of the new container. The top of the root ball should be level with the soil surface.
Step 5: Fill with soil & water
Add soil around the sides of the root ball, gently tamping it down to remove air pockets. Be careful not to pack the soil too tightly, as this can slow root growth. Give your newly transplanted cannabis a good watering to help settle the soil and reduce transplant shock.
For successful cannabis transplanting, the trick is minimizing root disturbances for a smooth transition to the new container. For additional details on this process, check out our quick guide on how to transplant cannabis plants.
Essential tools & materials for transplanting cannabis
Having the right equipment on hand can make the transplanting process smoother and more efficient. Here’s a comprehensive list of what you’ll need:
- Appropriately sized containers – We recommend our child resistant glass jars for various growth stages. These jars offer a secure environment for your plants.
- Quality potting soil – Look for soil that’s formulated for cannabis, or create your own mix with good drainage and nutrient content.
- Gardening gloves – Protect your hands and prevent the transfer of oils or contaminants to the plant.
- Trowel or small shovel – Essential for moving soil and creating holes in the new container.
- Watering can – For thorough watering after transplanting.
- Non-woven bags – These bags provide good airflow and are sturdy enough to transport plants safely.
- Pruning shears – For trimming any damaged roots or foliage.
- pH meter – Make sure the soil in the new container has an optimal pH level for cannabis (generally 6.0-7.0 for soil).
- Rooting hormone – This is optional but can help reduce transplant shock and promote faster root development in the new container.
Having these tools ready before you begin will make the transplanting process more efficient and less stressful for both you and your plants.
Best practices for transplanting cannabis
To ensure the best results when transplanting your cannabis plants, from seedlings to mature plants, keep these expert tips in mind:
- Always use clean, sterilized containers – It prevents pathogens that could harm your plants. Choose containers that are pre-sterilized.
- Avoid transplanting in the flowering stage – This can stress the plant and potentially reduce your yield. Plan the final transplant right before switching to the flowering light cycle.
- Water thoroughly after transplanting – This helps settle the soil around the roots and reduces transplant shock. However, avoid overwatering, as this can lead to root rot.
- Minimize root disturbance – Be especially gentle with seedlings. The less you disturb the roots, the quicker the plant will recover from transplanting.
- Allow for a transplanting recovery period – Reduce light intensity for a day or two after transplanting to give the plant time to adjust to its new environment.
- Ensure the new container isn’t too large – For seedlings, a container that’s too big can lead to overwatering and poor root development. Gradually increase pot size as the plant grows.
- Maintain consistent growing conditions – Try to keep temperature, humidity and light levels the same before and after transplanting to minimize stress.
- Use a root stimulator – Products containing beneficial bacteria and mycorrhizae can help promote faster root development in the new container.
For more cultivation tips, visit our blog on the right nutrients for successful cannabis cultivation.
8 common mistakes to avoid when transplanting cannabis
Even experienced growers can make errors during transplantation. Being aware of these common pitfalls can help you avoid them:
1. Transplanting too early or too late
Timing is absolutely vital in the transplanting process. It’s a delicate balance that can greatly impact your plant’s health and growth rate. Transplanting too early:
- Risks: Premature transplanting can shock a young plant which can stunt its growth or even cause death. The root system is fragile and may not be developed enough to handle the stress of moving.
- Signs you’re transplanting too early: Less than 3-4 sets of true leaves, roots not visible at the drainage holes. Plant looks small and fragile.
- Consequences: Slowed growth, wilting, yellowing leaves or plant death.
2. Transplanting too late
- Risks: Waiting too long leads to root binding, where roots circle the bottom of the container and start growing up the sides. It restricts nutrient uptake and can permanently affect the plant’s growth.
- Signs you’re transplanting too late: Slowed growth despite proper care, roots visibly circling the drainage holes, plant looking disproportionately large for its container.
- Consequences: Stunted growth, nutrient deficiencies and increased susceptibility to pests and diseases.
3. The sweet spot
Try to transplant when your plant has 3 – 4 sets of true leaves and roots are visible at the drainage holes but not extensively matted. It occurs most often 2 – 3 weeks after germination for seedlings, and every 2 – 4 weeks after that depending on growth rate.
- Using containers that are too large: While it might seem intuitive to provide your cannabis plant with plenty of room to grow from the start, using oversized containers can actually hinder growth, especially for young plants and seedlings. Why it’s a problem:
- Overwatering risk – Excess soil holds more water than the young plant can use, leading to waterlogged conditions that can cause root rot.
- Poor root development – Roots tend to grow outward searching for water. In an oversized pot, they may not develop the dense, healthy root system needed for optimal nutrient uptake.
- Wasted resources – Larger pots require more soil and nutrients, much of which goes unused in the early stages.
4. Damaging roots during the process
The root system is the lifeline of your cannabis plant, and rough handling during transplanting can cause much harm. Even small injuries to the roots can lead to stunted growth, increased susceptibility to diseases or even plant death.
Be exceptionally gentle when handling the root ball, and try to keep it as intact as possible. If you need to untangle roots, do it carefully with clean hands or tools.
5. Not preparing the new container properly
The new home for your cannabis plant needs to be just right to ensure a smooth transition and continued healthy growth. Proper preparation involves several steps:
- Adequate drainage – Your container should have sufficient drainage holes to prevent water logging. If using our child resistant glass jars, consider adding a layer of pebbles or hydroton at the bottom for improved drainage.
- High-quality soil – The growing medium should be rich in nutrients and have good water retention properties while still allowing for proper aeration. Consider mixing in perlite or vermiculite to improve soil structure.
- Pre-moistened soil – The new soil should be slightly damp, not soaking wet or bone dry. This creates an inviting environment for the roots to expand into.
- Center planting hole – This needs to be slightly larger than the root ball of the cannabis plant you’re transplanting.
6. Exposing cannabis seedlings to intense light after transplanting
Transplanting is a stressful process for plants, and sudden exposure to intense light can compound this stress, potentially leading to leaf burn or stunted growth. Instead, implement a gradual acclimation process:
- Day 1-2: Reduce light intensity to about 25% of normal levels.
- Day 3-4: Increase to 50% of normal intensity.
- Day 5-6: Raise to 75% of normal levels.
- Day 7 onwards: Return to full light intensity. The gradual increase allows the plant to recover from transplant shock and adapt to its new environment.
7. Forgetting to label plants
In a growing operation – especially with multiple strains – proper labeling isn’t just helpful; it’s essential. Without labels, you risk mixing up strains, losing track of feeding schedules or forgetting when each plant was transplanted. Use our custom cannabis labels to create a robust labeling system. Include information such as:
- Strain name
- Date of transplant
- Current growth stage
- Any special care instructions
8. Neglecting pH levels
The pH of your new soil can impact nutrient uptake substantially. Always check and adjust pH levels in the new container.
When you avoid these common mistakes, you’ll dramatically increase the success rate of your cannabis transplants and promote healthier, more vigorous growth.
The role of proper packaging in cannabis transplantation
Using the right packaging is crucial not just for storage, but also for the transplantation process. The containers you choose can impact plant health, growth, and even your workflow efficiency. Consider these factors when choosing packaging:
- Size – From seedling to mature plant, having the right size container is crucial. Our child resistant jars and bags cater to all growth stages.
- Material quality – Containers need to be sturdy enough to handle and protect the plant. Our high-quality glass and plastic options ensure durability.
- Light protection – Some strains benefit from root zone darkness. We carry several container options that provide this protection.
- Compliance – Cannabis cultivation typically has strict packaging regulations. Our products meet compliance standards to give you packaging peace of mind.
- Space efficiency – For commercial growers, how containers stack and store can impact operational efficiency. Our containers are designed with this in mind.
- Reusability – Being able to sterilize and reuse containers can be cost-effective. Our containers are designed for easy cleaning and multiple uses.
Our inventory includes a variety of cannabis packaging solutions for various growth stages and transplantation, and we have solutions to support your entire growth cycle.
Different growing mediums for transplanting cannabis
Transplanting cannabis varies based on what you choose to grow it in. In soil (most common method), make sure the new soil is similar to the original soil to avoid shocking the plant.
For hydroponics, handle roots gently when moving plants into new systems for proper nutrient absorption. In coco coir which supports faster root development, transplant more frequently and ensure the coir is properly buffered. Rockwool is ideal for seedlings and clones; transplanting often involves moving the entire cube with the plant.
Minimal transplanting is needed in aeroponics, but when it happens, protect the delicate root hairs. For Deep Water Culture (DWC), be sure the roots are well-submerged and the plant is securely positioned. Keep an eye on nutrient levels post-transplant as well.
For more information on different growing methods, see our guide on growing marijuana with hydroponics.
From seedling to harvest: Nurturing your cannabis through multiple transplants
Growing cannabis is a journey filled with milestones, and transplanting is one of the biggest. As your plants grow from delicate seedlings to robust adults, they’ll need new homes to thrive. Your job? Be the attentive caretaker who knows when it’s time for an upgrade.
Your toolkit should include quality containers, rich soil and proper transplanting tools. They’re the difference between a smooth transition and a stressful move for your green (cannabis, that is).
Along the way, you’ll face challenges like overwatering, root damage or transplant shock. Navigate these by treating your plants with gentle care. Create a welcoming new home, and give them time to settle in. Patience is key.
Your choice of containers matters at every stage. From snug seedling pots to spacious final homes, each plays an important role. As you gain experience, you’ll level up your skills. Air pruning and beneficial microbes may become your advanced techniques. And because different growing mediums are like different learning styles, each needs its own approach.
Consistency ties it all together. Develop a transplanting routine and stick to it. It’s your secret recipe for reproducible success.
This journey isn’t just about growing plants – it’s about growing as a cultivator. Each transplant is a chance to give your cannabis the best conditions to thrive. Refine your skills, learn this art and you’ll see the rewards in healthier cannabis plants with bigger yields.
Cannabis cultivation through expert transplanting
Mastering the art of transplanting is what distinguishes expert cultivators. But success doesn’t end at harvest. Protecting and preserving your carefully nurtured plants is just as important. Green Rush Packaging supports growers through every stage with professional solutions:
- Glass jars in various sizes for different growth stages
- Barrier bags to maintain proper humidity levels
- Child resistant containers for secure storage
- Concentrate containers designed for extracts
- Custom packaging solutions to showcase your brand
From seedling to harvest, proper packaging plays a vital role in cannabis cultivation success. Our complete range of professional packaging solutions is designed to protect your investment at every stage of growth.
Ready to elevate your cultivation game? Shop our collection now >


